Bargello by Ruth Ann Berry
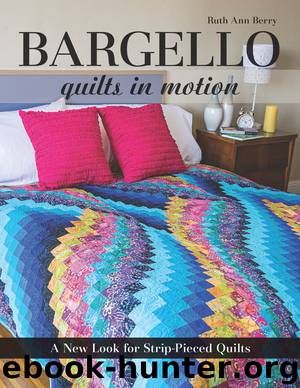
Author:Ruth Ann Berry
Language: eng
Format: epub
Publisher: C&T Publishing
Lavender Dreams
FINISHED PROJECT SIZE: 76½˝ × 97¼˝
I’ve never visited a field of lavender plants, but I’ve seen photos of them. I finally got one plant to survive in my Michigan flowerbed, and the scent of the leaves is exquisite after a rain. If my plant ever actually blooms, I know I will love the soothing purple color. Yes, I’m definitely dreaming of lavender. The two-color contrast in this quilt is lavender on cream.
MATERIALS
10 fabrics each of two different color runs, graduating in value from light to dark: ¾ yard of each for the scribble and ¾ yard of each for the background
Backing: 2½ yards 108˝-wide quilt backing or 6 yards 45˝-wide fabric
Batting: 86˝ × 104˝
Binding: 1 yard
CUTTING
From each of the 10 scribble fabrics, cut 9 strips 2½˝ × width of fabric.
From each of the 10 background fabrics, cut 8 strips 2½˝ × width of fabric.
Create a Fabric Number Chart (page 6) by attaching a small clipping of each fabric to a piece of paper and numbering 1–20. The lightest scribble fabric should be designated fabric 1, and the darkest scribble, fabric 10. The lightest background fabric should be fabric 11, and the darkest background, fabric 20.
From binding fabric, cut 9 strips 3˝ × width of fabric.
Assemble the Strip Sets
Seam allowances are ¼˝ for all quilt assembly steps.
1.Construct 9 strip sets using the scribble fabrics in numerical order from 1 to 10 (refer to Constructing Strip Sets, page 7).
2.In the same manner, construct 8 strip sets using the background fabrics in numerical order from 11 to 20.
Construct the Vertical Columns
Refer to Cutting Bargello Strips and Constructing Vertical Columns (page 8) as needed.
Construct Column 1
1.From a scribble strip set, cut 2 strips 1½˝ wide.
2.From a background strip set, cut 4 strips 1½˝ wide.
3.Start with a partial background strip (fabrics 19–20).
4.Add a full background strip.
5.Add a full scribble strip.
6.Add a partial background strip (fabrics 15–20).
7.Add a full scribble strip.
8.Add a full background strip.
9.Mark the column number on the back of the first rectangle in the column.
10.Press seam allowances toward the bottom of the column.
Construct Column 2
1.From a scribble strip set, cut 3 strips 1¾˝ wide.
2.From a background strip set, cut 3 strips 1¾˝ wide.
3.Start with a partial background strip (fabric 20).
4.Add a full background strip.
5.Add a full scribble strip.
6.Add a partial scribble strip (fabrics 9–10).
7.Add a partial background strip (fabrics 15–20).
8.Add a full scribble strip.
9.Add a partial background strip (fabrics 11–19).
10.Mark the column number on the back of the first rectangle in the column.
11.Press seam allowances toward the top of the column.
Construct the Remaining Columns
Use the same process to create the rest of the columns, referring to the Design Chart (pages 34 and 35) for cut widths and fabric order. Alternate pressing direction for each column.
Sew Together the Columns
After constructing the columns, sew the vertical seams as described in Sewing Vertical Columns (page 9).
Finishing
Refer to Finish It (page 46) to layer, quilt, and bind your quilt.
Download
This site does not store any files on its server. We only index and link to content provided by other sites. Please contact the content providers to delete copyright contents if any and email us, we'll remove relevant links or contents immediately.
On Writing A Memoir of the Craft by Stephen King(4996)
The Doodle Revolution by Sunni Brown(4822)
A Simplified Life by Emily Ley(4213)
Mummy Knew by Lisa James(3726)
Marijuana Grower's Handbook by Ed Rosenthal(3714)
Better Homes and Gardens New Cookbook by Better Homes & Gardens(3626)
Figure Drawing for Artists by Steve Huston(3490)
Paper Parties by Erin Hung(3448)
Draw Your Day by Samantha Dion Baker(3411)
The Genius of Japanese Carpentry by Azby Brown(3344)
The Code Book by Simon Singh(3249)
Japanese Design by Patricia J. Graham(3213)
Dangerous Girls by Haas Abigail(3070)
The Curated Closet by Anuschka Rees(3004)
Lions and Lace by Meagan Mckinney(2999)
How to Make Your Own Soap by Sally Hornsey(2942)
The Checklist Manifesto by Atul Gawande(2892)
The Wardrobe Wakeup by Lois Joy Johnson(2817)
Keep Going by Austin Kleon(2810)
